In this how-to article, we will guide you through the process of listing payment remarks for a set of Norwegian companies—each identified by its unique organization number. Payment remark data is essential for evaluating a company’s credit risk and making informed financial decisions. By following this step-by-step guide, you will learn how to retrieve and parse payment remark data and integrate it seamlessly into your Excel workflow.
Important:
This integration is legally regulated as a company credit check. You are solely responsible for ensuring that you have the proper legal basis to retrieve payment remark data for the companies in question. Furthermore, there are strict requirements regarding the handling of payment remark data, especially with respect to data deletion. If you have any doubts, please consult with legal counsel before proceeding.
Note:
This integration requires the role "credit_check". If you do not have this role, please contact team@enin.ai to determine your eligibility.
¶ Company Organization Number Source
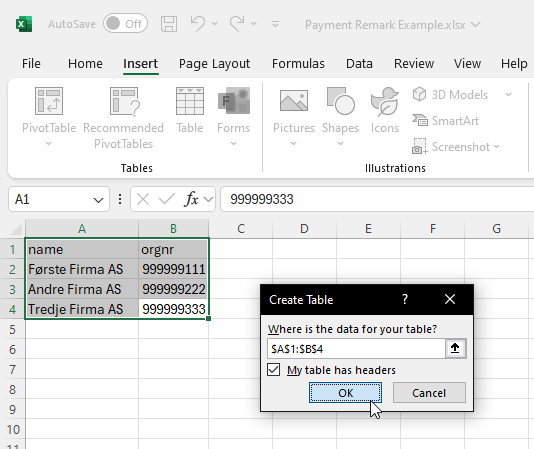
To begin, you will need a list of companies. This list can either be a static dataset that you manage or, alternatively, you can integrate a watchlist from Enin directly into your Excel worksheet. For this guide, we will use a static list consisting of three example companies:
- "Første Firma AS" with organization number
999999111 - "Andre Firma AS" with organization number
999999222 - "Tredje Firma AS" with organization number
999999333
Start by creating a new Excel spreadsheet and save it as "Payment Remark Example.xlsx" on your desktop. Rename the default worksheet to "Companies" (located at the bottom of the page). Enter the company data provided above, select the data range, navigate to the Insert ribbon, and click "Table".
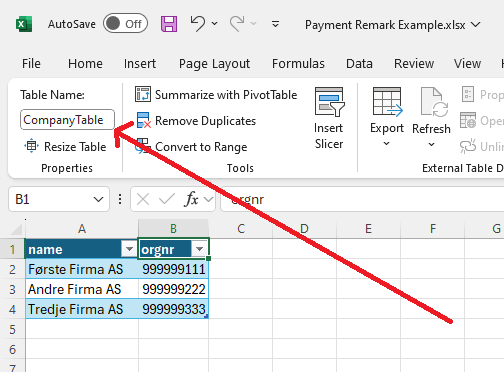
After converting the data into a table, rename it to CompanyTable.
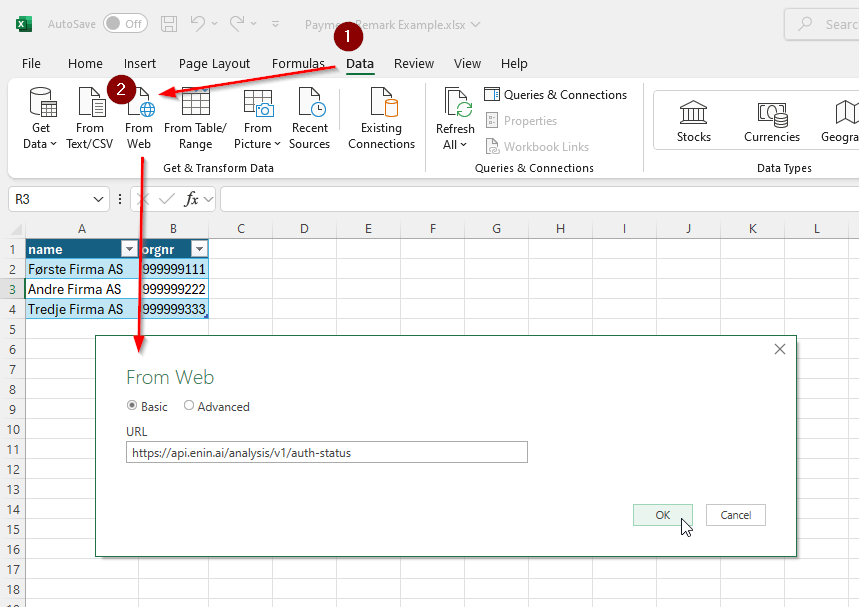
¶ Authentication
Next, set up authentication using Basic HTTP authentication to verify your identity. In Excel, navigate to the Data ribbon, select From Web, and enter the URL below:
https://api.enin.ai/analysis/v1/auth-status
Click OK. This action tests your authentication and establishes your credentials for subsequent requests from the spreadsheet.
On the following screen, choose Basic from the options on the left, enter your credentials, and select https://api.enin.ai/ as the authentication level. This configuration ensures that all requests under this domain share the same authentication details.
Click Connect, then select Into Table, and finally click Close & Load.
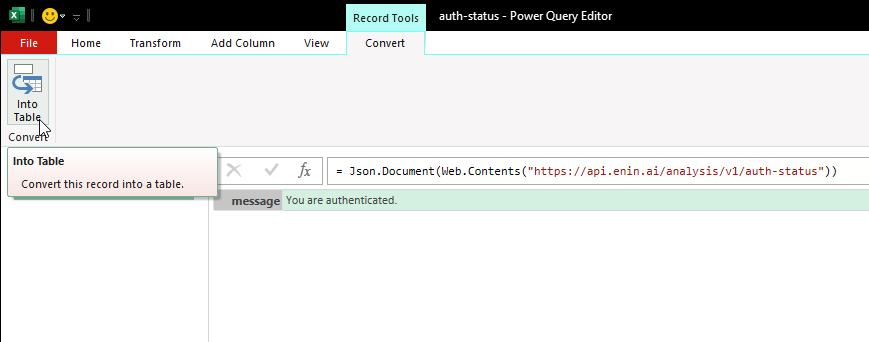
After the process completes, you will see a new worksheet named auth-status displaying "You are authenticated". You may delete or hide this sheet if desired. Your authentication is now complete.
¶ Finding the Payment Remark Endpoint
Next, locate the appropriate endpoint by visiting the Enin API endpoint reference. Scroll down to the Company Risk section and find the endpoint:
[
  {
    "company_credit_risk": {
      "company_uuid": "string",
      "risk_score": 0,
      "risk_class": "very_low",
      "has_company_risk_status": true,
      "company_risk_statuses": [
        "string"
      ],
      "company_risk_status_history": {
        "company_status": "confirmed_dead",
        "from_date": "2025-03-07",
        "to_date": "2025-03-07"
      }
    },
    "company_payment_remarks": [
      {
        "company_uuid": "string",
        "latest_debt_amount": 0,
        "creditor_name": "string",
        "case_number": "string",
        "date": "2025-03-07"
      }
    ],
    "company": {
      "uuid": "string",
      "name": "string",
      "org_nr": "string",
      "org_nr_schema": "string",
      "app_url": "string"
    }
  }
]
The field company_payment_remarks is our target. To retrieve this data, make a GET request to:
https://api.enin.ai/analysis/v1/company/{company_identifier}/company-credit-risk-composite
If you are using Norwegian organization numbers, adjust the URL to:
https://api.enin.ai/analysis/v1/company/NO{orgnr}/company-credit-risk-composite
¶ Authorization in Excel
After verifying your identity and determining the correct endpoint, you must now confirm that you have the right to access the data. Typically, this is done by including an Nk-Role-Key header in the HTTP request. In this case, you need to claim the role credit_check (which you must have been granted in advance).
Since Excel does not easily support custom headers, you can instead include the role as a query parameter. Append the following parameter to your URL:
https://api.enin.ai/analysis/v1/company/NO{orgnr}/company-credit-risk-composite?nk_role_keys=credit_check
¶ Fetching the Payment Remark Data
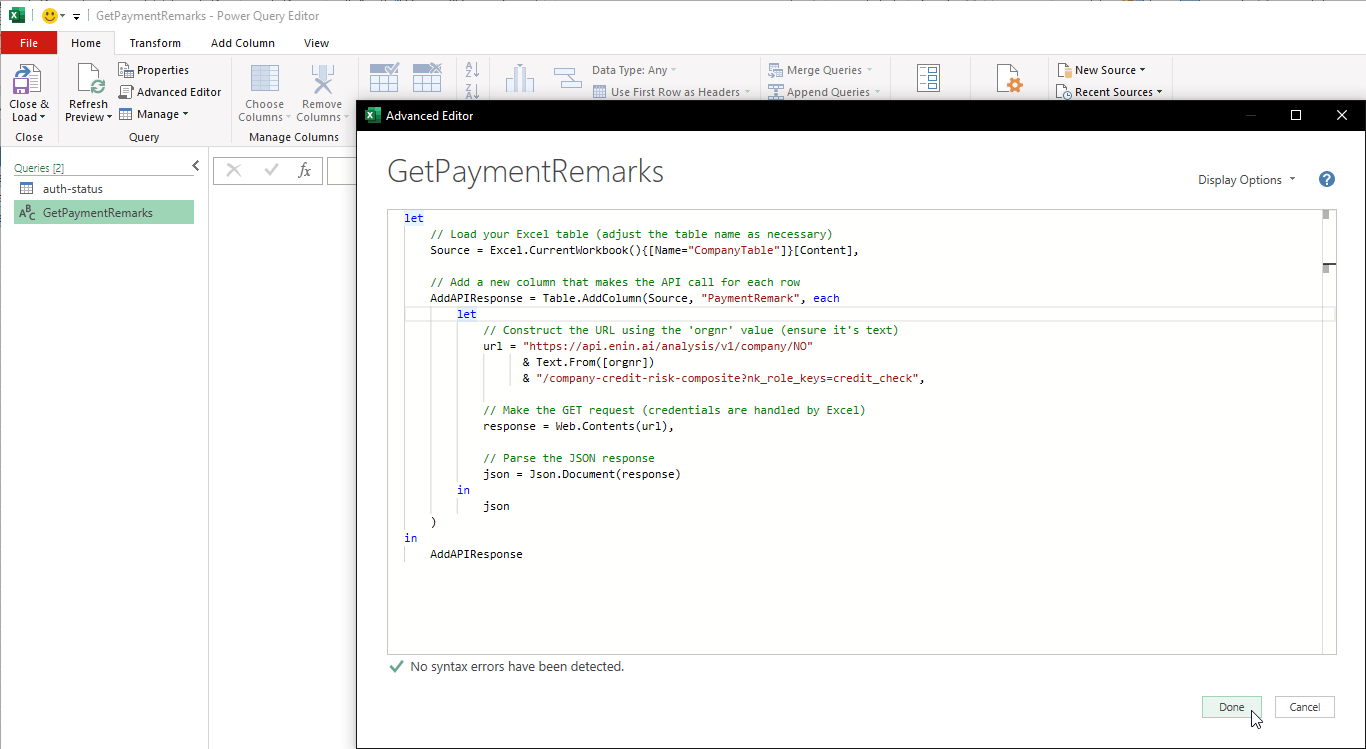
It is now time to execute the HTTP requests. Follow these steps:
- In Excel, go to the Data ribbon, select Get Data, then From Other Sources, and finally choose Blank Query.
- Rename the query from Query1 to GetPaymentRemarks.
- Right-click the query and select Advanced Editor.
- Copy and paste the code below into the editor:
let
    // Load your Excel table (adjust the table name as necessary)
    Source = Excel.CurrentWorkbook(){[Name="CompanyTable"]}[Content],

    // Add a new column that makes the API call for each row
    AddAPIResponse = Table.AddColumn(Source, "PaymentRemark", each
        let
            // Construct the URL using the 'orgnr' value (ensure it's text)
            url = "https://api.enin.ai/analysis/v1/company/NO"
                  & Text.From([orgnr])
                  & "/company-credit-risk-composite?nk_role_keys=credit_check",

            // Make the GET request (credentials are handled by Excel)
            response = Web.Contents(url),

            // Parse the JSON response
            json = Json.Document(response)
        in
            json
    )
in
    AddAPIResponse
It should resemble the screenshot below:
At this point, you might encounter the following prompt:
Information is required about data privacy.
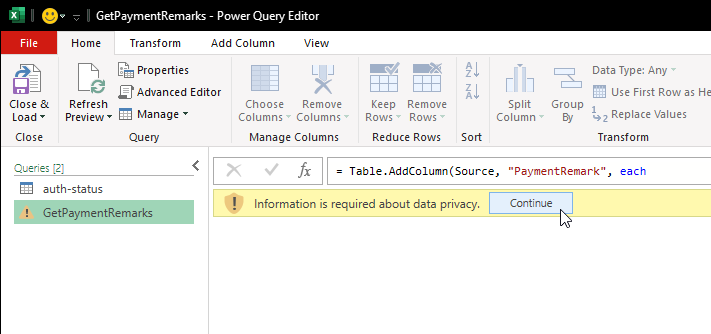
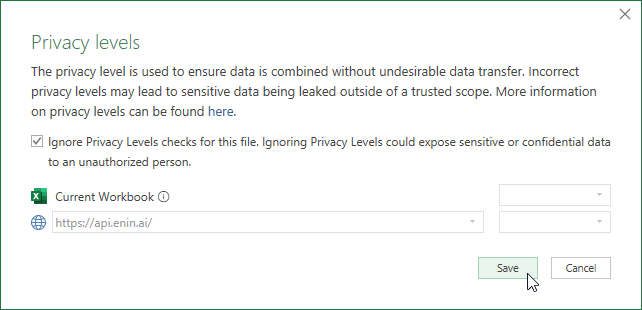
Click Continue. On the next page, consult with your organization's IT security team for the proper security configuration. For this guide, select Ignore Privacy Levels checks for this file since this example is for demonstration purposes only.
Consult with your organization's IT security team for the appropriate security level configuration.
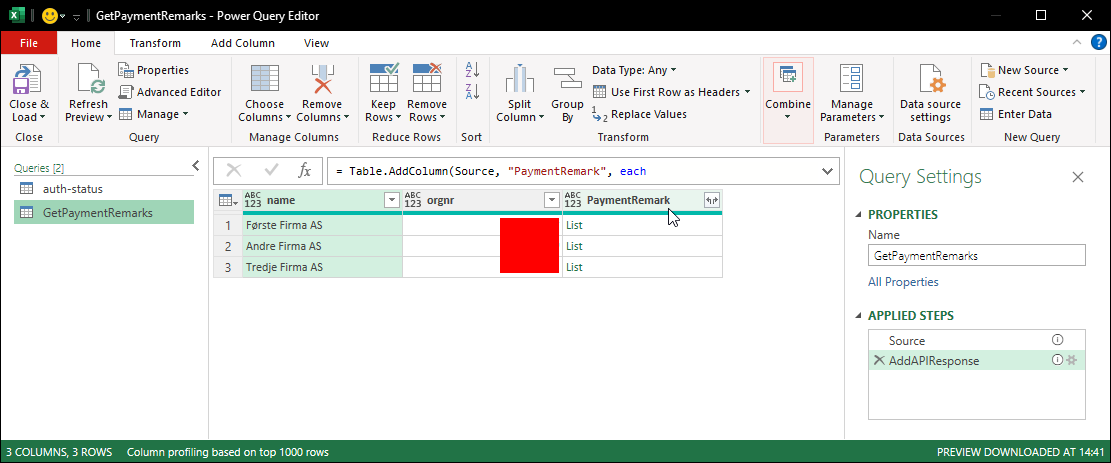
If the data is downloaded successfully, the PaymentRemark column will display "List" objects:
¶ Parsing the Payment Remark Data
With the payment remark data retrieved, the next step is to parse it:
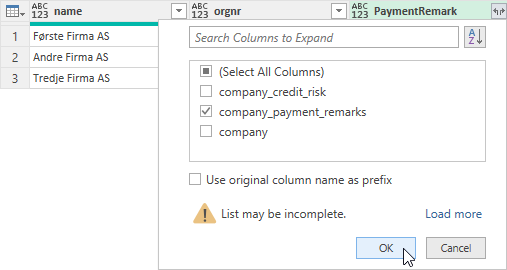
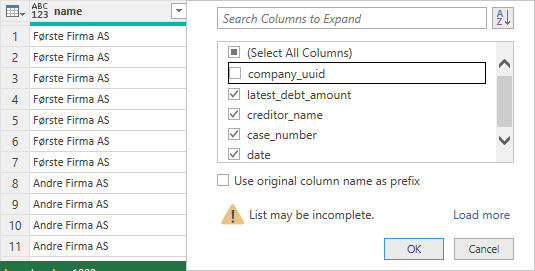
- Expand the PaymentRemark column.
- Select the relevant field company_payment_remark.
- Expand this field again.
- Choose the pertinent fields required for your analysis.
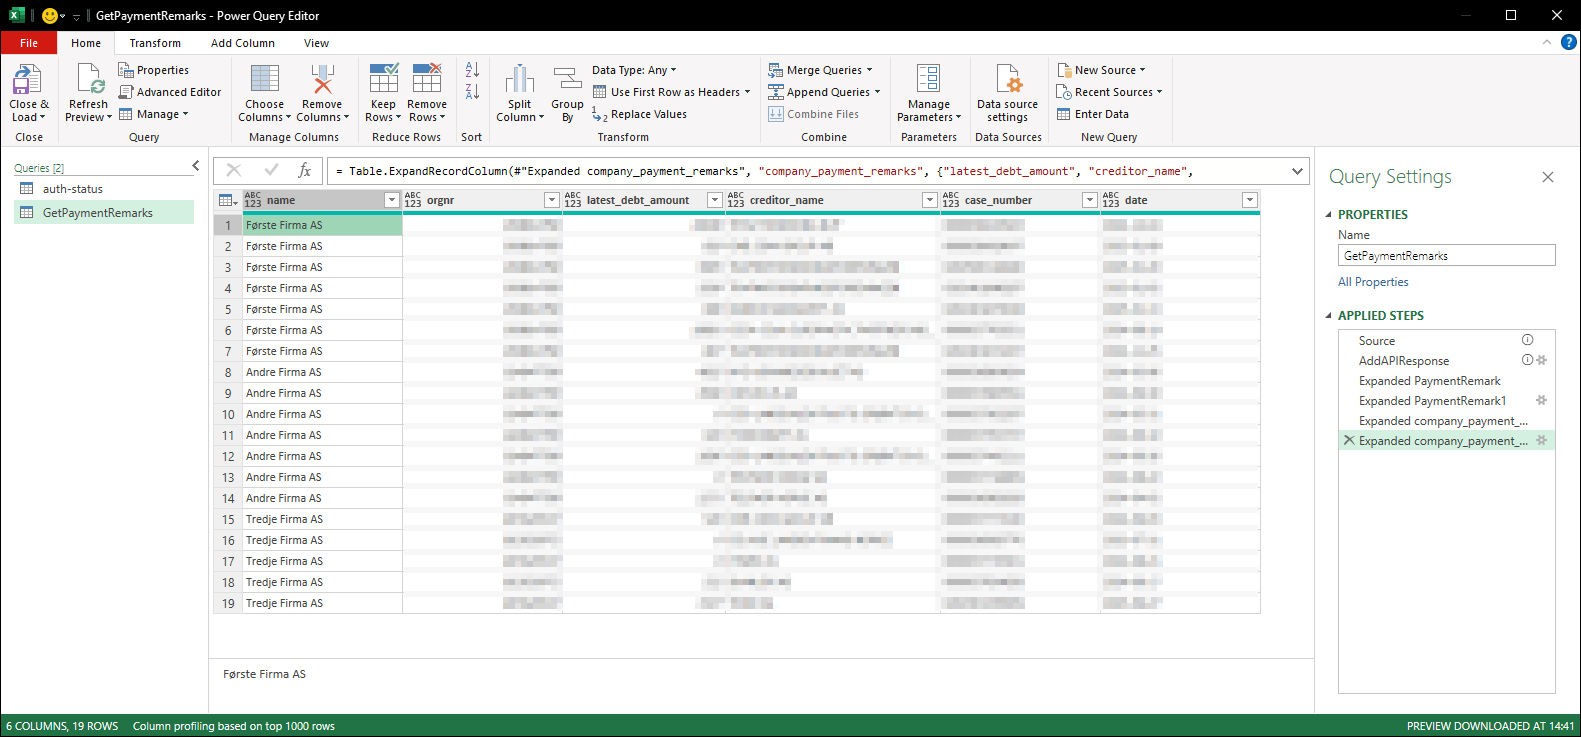
You should now have a flattened dataset with the payment remark details. Finally, click Close & Load to import the data into your workbook.
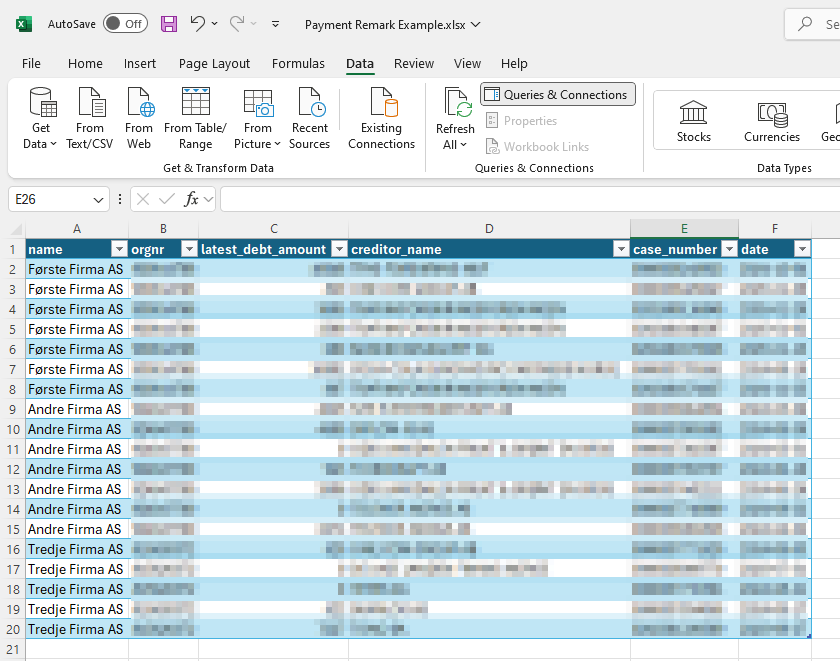
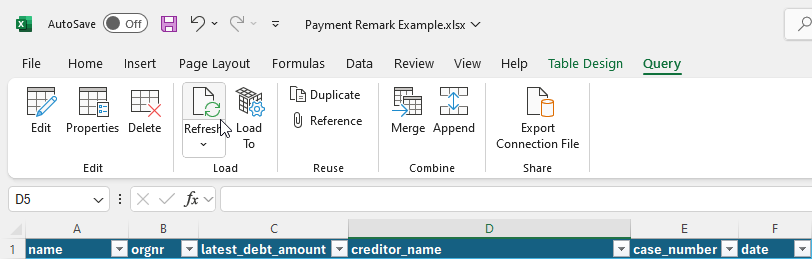
¶ Refreshing the Data
To update the view with fresh data, click on the PaymentRemark table, navigate to the Query ribbon, and select Refresh:
¶ Conclusion
In conclusion, this guide has walked you through the complete process of setting up authentication, locating the correct API endpoint, and retrieving payment remark data from the Enin API using Excel. By following these steps, you ensure that your data retrieval process is efficient, secure, and compliant with legal requirements. Always verify that you have the appropriate permissions and consult with your legal and IT security teams as needed. With this robust integration in place, you can confidently manage credit risk data for Norwegian companies and make informed financial decisions.